
News
10 Essential High Pressure Hose Inspection Checks Every Operator Should Complete
When operating high pressure water jetting equipment, your hose is invaluable, and arguably one of the hardest working bits of kit on your unit. So why overlook vital safety checks?
Every day, high pressure hoses are exposed to extreme operating pressures, abrasion, bending and harsh working environments. Even minor damage can rapidly develop into catastrophic failure, resulting in equipment downtime, costly repairs or, in the worst cases, serious injury.
That’s why a thorough inspection of your high-pressure hose before every shift is key to helping identify potential issues before they become dangerous, keeping operators safe and equipment performing as intended.
So, what’s the best course of action? Here’s 10 essential checks that every operator should complete before putting a high-pressure hose into service.
Why Checking High-Pressure Hose Matters
A damaged hose isn’t always obvious.
What you’re seeing on the outside doesn’t always give you the bigger picture – internal reinforcement can deteriorate long before failure occurs, meaning a hose that appears serviceable may already be unsafe.
According to industry guidance, hoses should be inspected by a competent person before every use and removed from service immediately if defects are identified. A failed hose can lead to:
- Serious high pressure injection injuries
- Hose whip
- Flying debris
- Equipment damage
- Lost productivity
- Costly downtime
Routine inspections are one of the simplest and most effective ways to reduce these risks.
1. Inspect the Entire Length of the Hose
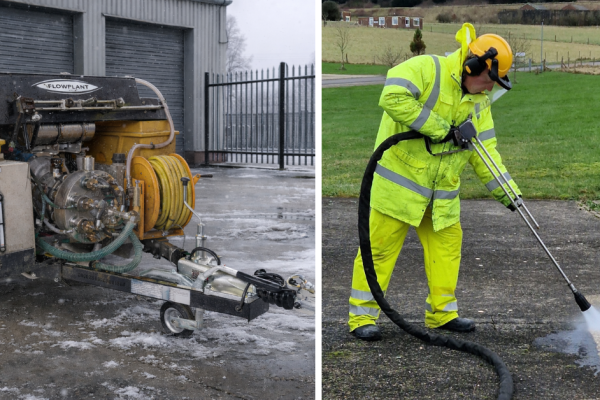
Start by laying the hose out as straight as possible.
Walk the full length and carefully examine the outer surface.
Look for:
- Cuts
- Abrasions
- Tears
- Crushing
- Flat spots
- Excessive wear
Even seemingly minor damage can weaken the hose structure over time.
2. Check the Outer Cover for Wear
The outer cover protects the reinforcing layers beneath.
If this protective layer has worn through, the hose should be removed from service immediately.
Pay particular attention to:
- Worn patches
- Deep abrasions
- Missing cover material
- Exposed reinforcement
A hose should never be operated if the steel braid is visible.
3. Look for Bulges, Kinks and Blisters
Changes to the hose’s shape are often signs of internal damage.
Immediately remove any hose showing:
- Bulges
- Blisters
- Permanent kinks
- Twisting
- Distortion
These defects indicate the internal reinforcement may already have failed.
4. Examine the End Fittings and Couplings
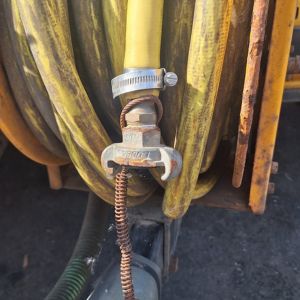
Many hose failures occur close to the fittings.
Inspect every connection for:
- Cracks
- Corrosion
- Loose fittings
- Damaged threads
- Rounded nuts
- Damaged crimp sleeves
Connections should always be tightened using the correct tools recommended by the manufacturer.
5. Confirm the Pressure Rating
Never assume every hose is suitable for every machine.
Check that the hose’s maximum working pressure is equal to or greater than the maximum operating pressure of the pump.
Using an underrated hose significantly increases the likelihood of failure.
6. Verify Hose Identification and Certification
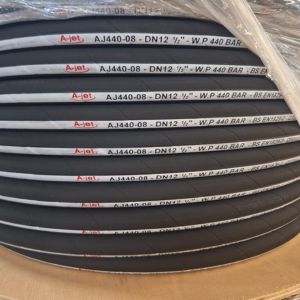
Every hose should be clearly marked with information including:
- Manufacturer identification
- Maximum working pressure
- Manufacturing date
- Product identification
Where applicable, inspection tags and certification should also be current and legible.
If markings can no longer be read, the hose should be assessed before further use.
7. Inspect the Hose Under Pressure
Once the system is safely running, perform another visual inspection.
Never run your hands along a pressurised hose.
Instead, look carefully for:
- Fine water mist
- Leaking fittings
- Drips
- Spray around couplings
A fine mist often indicates the hose wall has been compromised and may burst without warning.
8. Check Hose Restraints and Connections
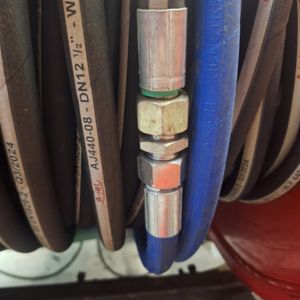
Where hoses are connected to equipment or joined together, ensure appropriate restraints are fitted where required.
Verify that:
- Connections are secure
- Hose restraints are correctly installed
- No excessive movement is possible
Proper restraints help minimise hose whip if a failure does occur.
9. Review Storage and Handling Damage
Many hose failures begin long before the equipment is switched on.
Inspect for damage caused by:
- Dragging over rough ground
- Crushing beneath vehicles
- Tight bend radius
- Twisting during storage
- Poor coiling
When not in use, hoses should be cleaned, loosely coiled and stored in a dry environment away from direct sunlight and chemicals.
10. Know When to Remove a Hose from Service
Perhaps the most important inspection step is recognising when a hose should no longer be used.
Remove a hose from service immediately if you find:
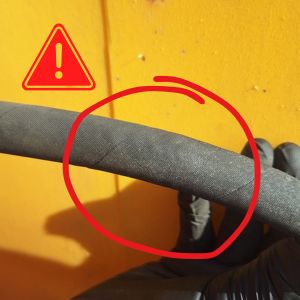
- Exposed reinforcing wires
- Broken steel braid
- Bulges or blisters
- Cuts exposing reinforcement
- Cracked fittings
- Severe corrosion
- Damaged threads
- Fine water mist during operation
- Crushing or flattening
- Loose or damaged couplings
When operator safety is at stake, replacing a damaged hose is always the safest option.
Best Practices for Extending Hose Life
Regular inspections are only one part of effective hose maintenance.
To maximise hose performance:
- Carry out inspections before every shift.
- Avoid dragging hoses across abrasive surfaces.
- Prevent twisting and tight bends during use.
- Protect hoses from vehicle traffic.
- Store hoses correctly after use.
- Use the correct pressure-rated hose for every application.
- Replace damaged hoses immediately rather than attempting temporary repairs.
Preventative maintenance not only improves safety but also reduces downtime and extends the service life of your equipment.
Why Flowplant Prioritises Hose Safety
At Flowplant, we understand that hose reliability is fundamental to safe and efficient high pressure jetting operations.
Whether supplying high pressure water jetting units, pumps or complete engineered systems, we know that operator safety starts with high-quality equipment, proper maintenance and routine inspections.
By following a structured inspection routine every day, operators can reduce risk, improve reliability and keep equipment operating at peak performance.
Final Thoughts
A high-pressure hose inspection only takes a few minutes, but those few minutes can prevent equipment failure, costly downtime and potentially life-changing injuries.
By completing these ten essential inspection checks before every shift, operators can identify early warning signs, remove damaged hoses from service and ensure their equipment remains safe, reliable and ready for work.
When it comes to high pressure jetting, prevention is always better than repair.
Frequently Asked Questions
How often should a high-pressure hose be inspected?
High pressure hoses should be visually inspected before every use and at the start of every working shift. Additional inspections should be carried out after any impact, crushing event or suspected damage.
What are the warning signs of a damaged high-pressure hose?
Look for exposed reinforcement, cuts, bulges, blisters, kinks, crushed sections, damaged fittings, corrosion or any water leaking from the hose while it is under pressure.
Is a small water mist from a hose dangerous?
Yes. A fine water mist is often an early indication that the hose wall has been compromised. The hose should be depressurised and removed from service immediately.
Can a damaged high-pressure hose be repaired?
Temporary repairs should never be attempted. Damaged hoses should be replaced or professionally re-terminated in accordance with the manufacturer’s recommendations.
How should high pressure hoses be stored?
Hoses should be cleaned after use, loosely coiled, protected from sharp bends and stored in a dry, cool environment away from direct sunlight, chemicals and excessive heat.
Recommended Further Reading:
- The Water Jetting Association (WJA) for best practice in high-pressure water jetting safety.
- The Health and Safety Executive (HSE) for workplace equipment safety and pressure systems guidance.
- BS EN ISO 4413 (Hydraulic fluid power – General rules and safety requirements for systems and their components) where relevant to hydraulic hose inspection.
- Hose manufacturer technical guidance for inspection and maintenance recommendations.